Remove Ugly Web Media with Shortcuts and JavaScript
Image: Francois Hoang
Freelance writers have to be adventurous, un-picky, ready to learn about a new subject every week. You research hard about your client's topic, throw yourself into it until you're much more than a surface-level summarizer, then enjoy that best kind of learning where you become the teacher, exploring the subject in your own words and absorbing it further into your bones.
It's a thrilling career and one that pays off in more ways than a check. Freelance writers gain knowledge, new perspectives and a deeper understanding of special and specialized parts of the world in which we live.
Sometimes, though, the topics aren't exactly pleasant. Research into these topics (think health topics, pest control, toilet repair) often surfaces less-than-pretty pictures and videos.
These can be… distracting while you're trying to write.
Let's get rid of 'em.
Tl;dr - Download the shortcut here!
Hide Ugly Media with Shortcuts on iOS
To make these dirty jobs a little easier on the eyes and a little less distracting from the flow, I created a simple shortcut.
I write mostly on my iPad, so this trick uses the Shortcuts app and its ability to run JavaScript on a web page in Safari.
If you're using a Mac, check out my bookmarklet that does the same thing!
When I'm reading a page that contains an ugly picture or a nonsense video, I can tap the share button, choose my shortcut from the list of actions and watch the media magically disappear.
The Code
A little coding know-how goes a long way.
I'm a beginner iOS programmer, an amateur web developer and a copy-and-paste JavaScript coder. Turns out, that's enough to get a good bit done on a computer!
To write the JavaScript code that runs in this shortcut, I adapted some JS from a Shortcut that was created by an engineer on Apple's Safari team to get a web page's canonical URL instead of its AMP address.
I only had to modify, not write from scratch, a few lines of JS—familiarity is enough to figure out what's going on in the function and Google your way to the proper substitutions.
The Shortcut
It uses only 1 action:
- Run JavaScript on Web Page
Add that action by searching for it in the actions panel.
Then, replace the boilerplate JavaScript with this:
var images = document.getElementsByTagName('img');
for (i = 0; i < images.length; i++) {
    images[i].style.display = "none";
}

var vids = document.getElementsByTagName('video');
for (i = 0; i < vids.length; i++) {
    vids[i].style.display = "none";
}

completion(true);
First, the code finds all instances of <img> and <video> HTML tags.
Then, it loops over both sets, changing each element's display property to "none". That removes them from the page.
(If you're better at JS than me, feel free to improve this code!)
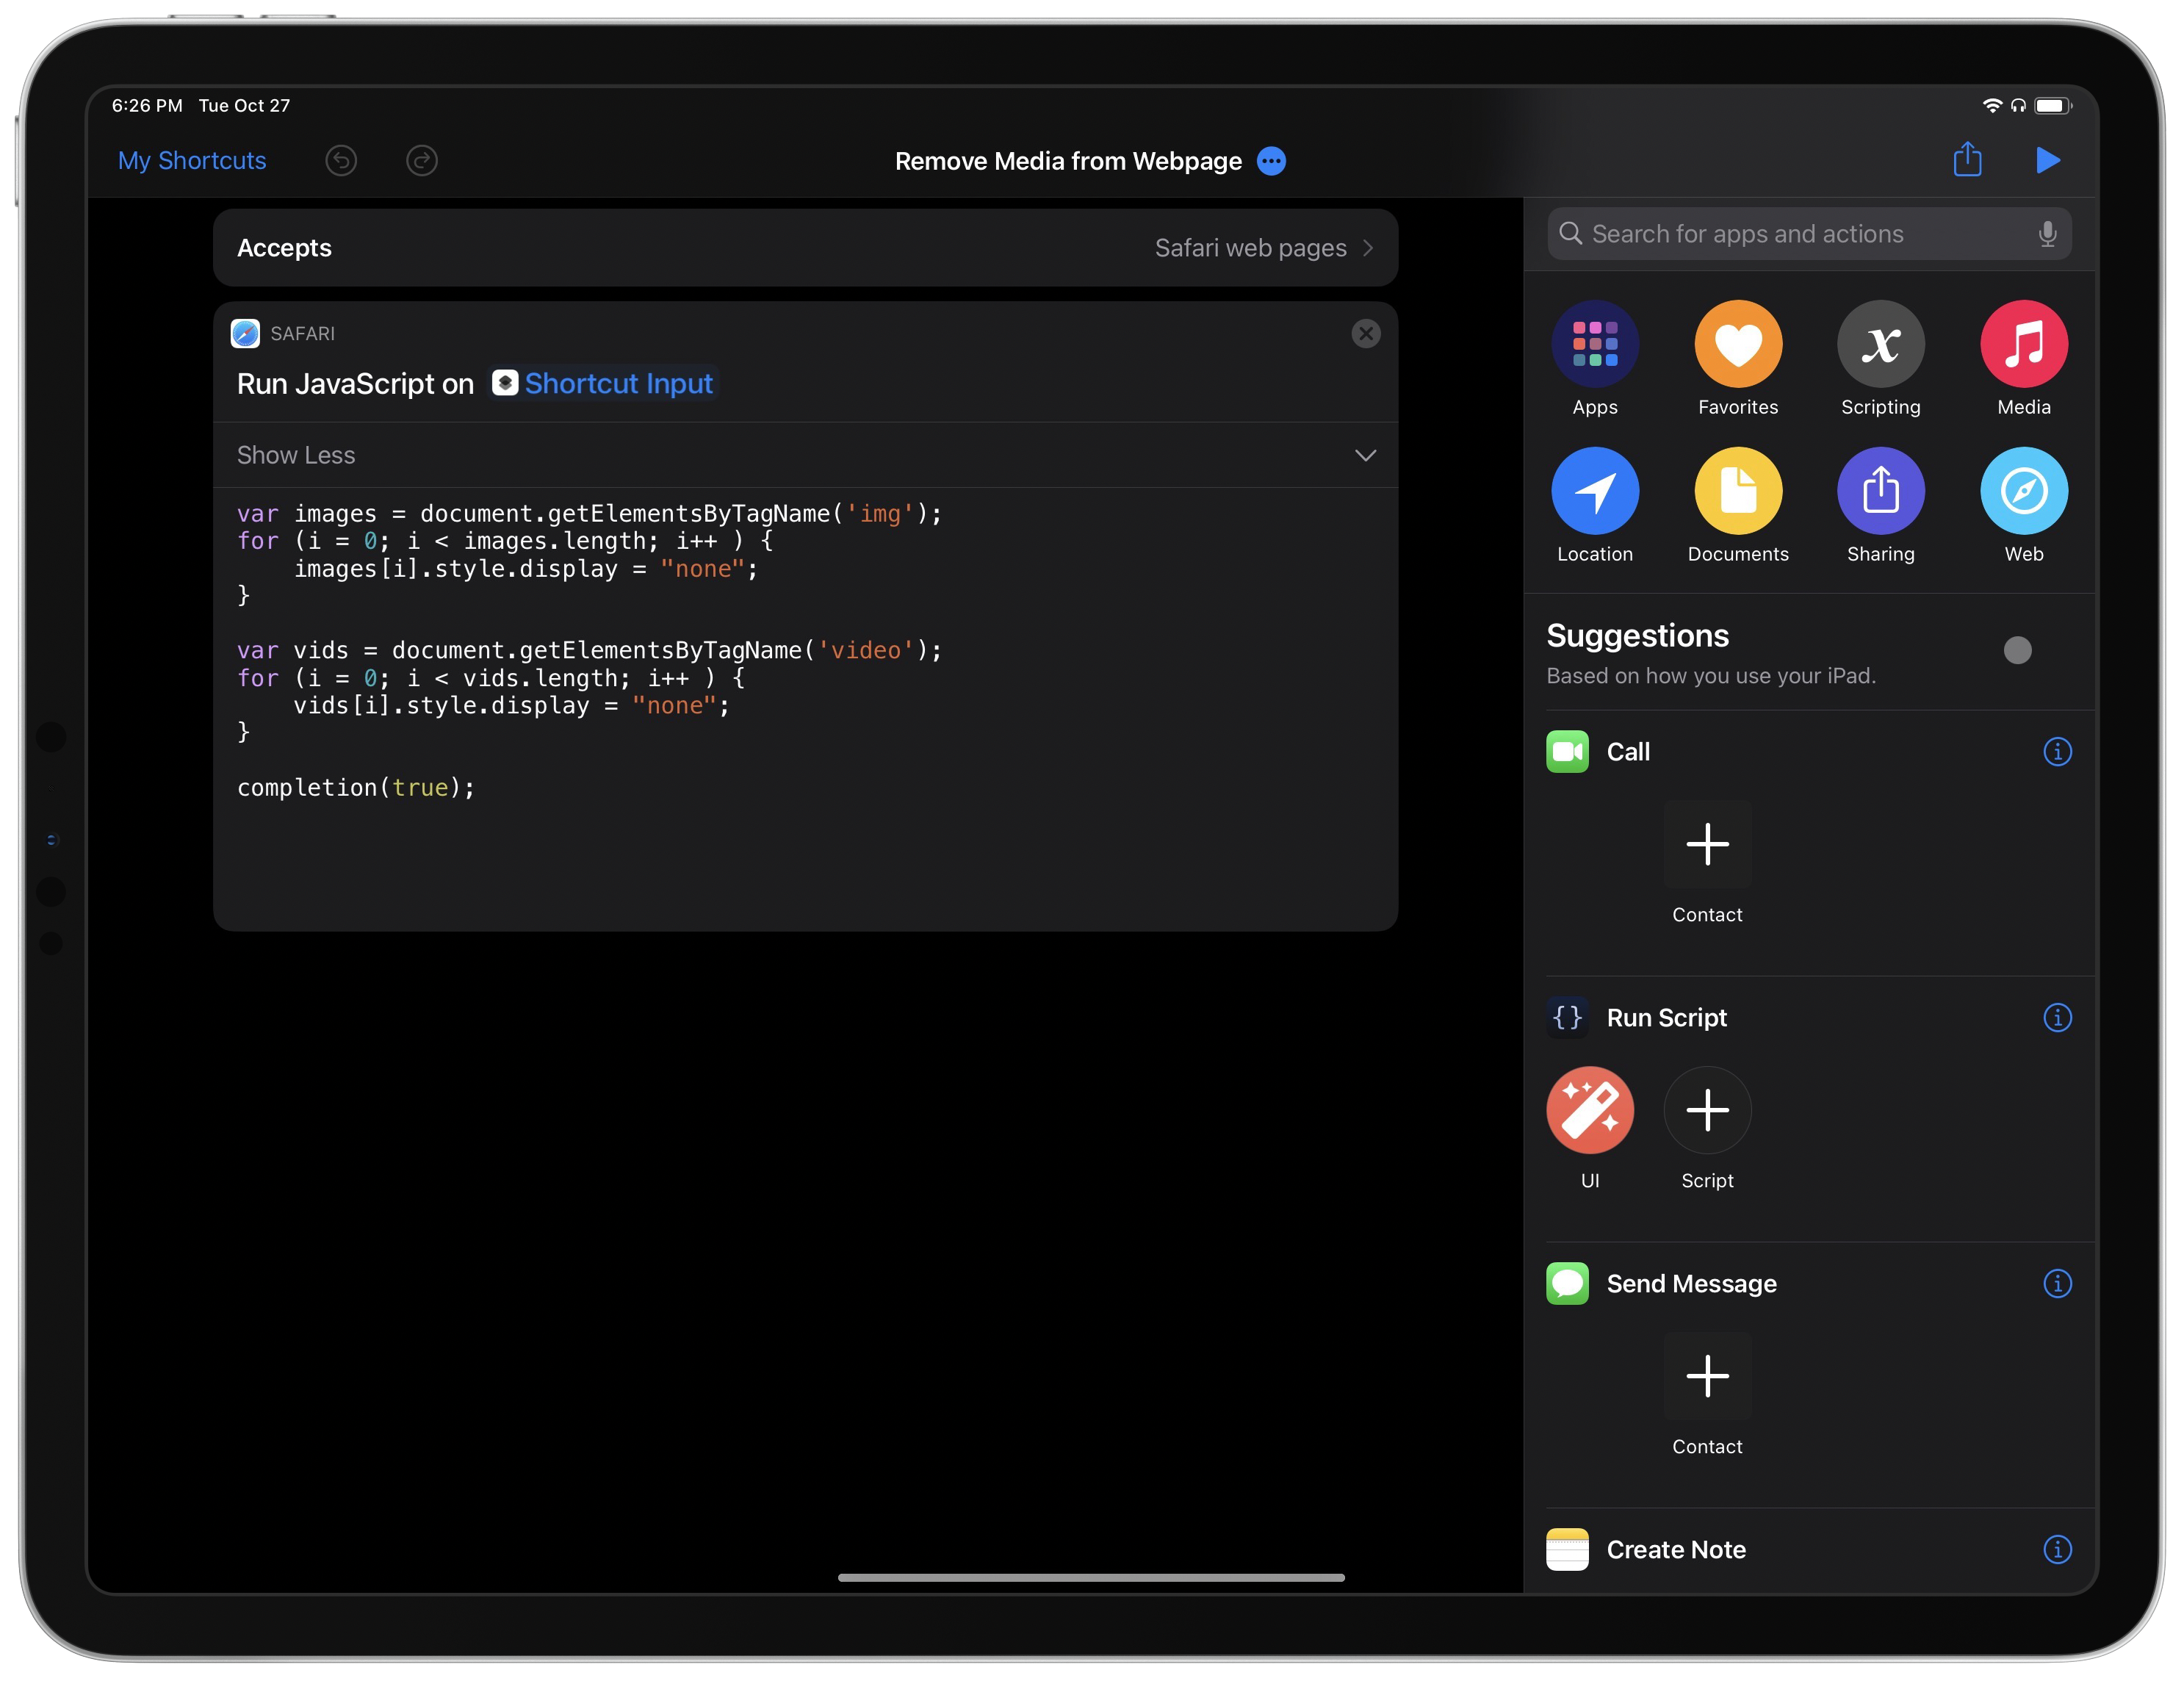
This is the single action used in this shortcut.
Configuring the Shortcut to Run on Web Pages
To use the shortcut from the share sheet in Safari on iOS, tap the "…" button next to its name at the top of the editor and turn on "Show in Share Sheet".
Tap "Share Sheet Types", tap "Deselect All" and, finally, select only "Safari web pages".
You should also rename the shortcut. Mine's called "Remove Media from Web Page". Give it a nice color and a recognizable glyph, too!
Now, back in the main editor, tap and hold on the blue placeholder text "Web Page" right at the top of the action. From the menu that appears, select Shortcut Input.
That sets the input to the website you'll pass into the shortcut from the share sheet.
Now, test it!
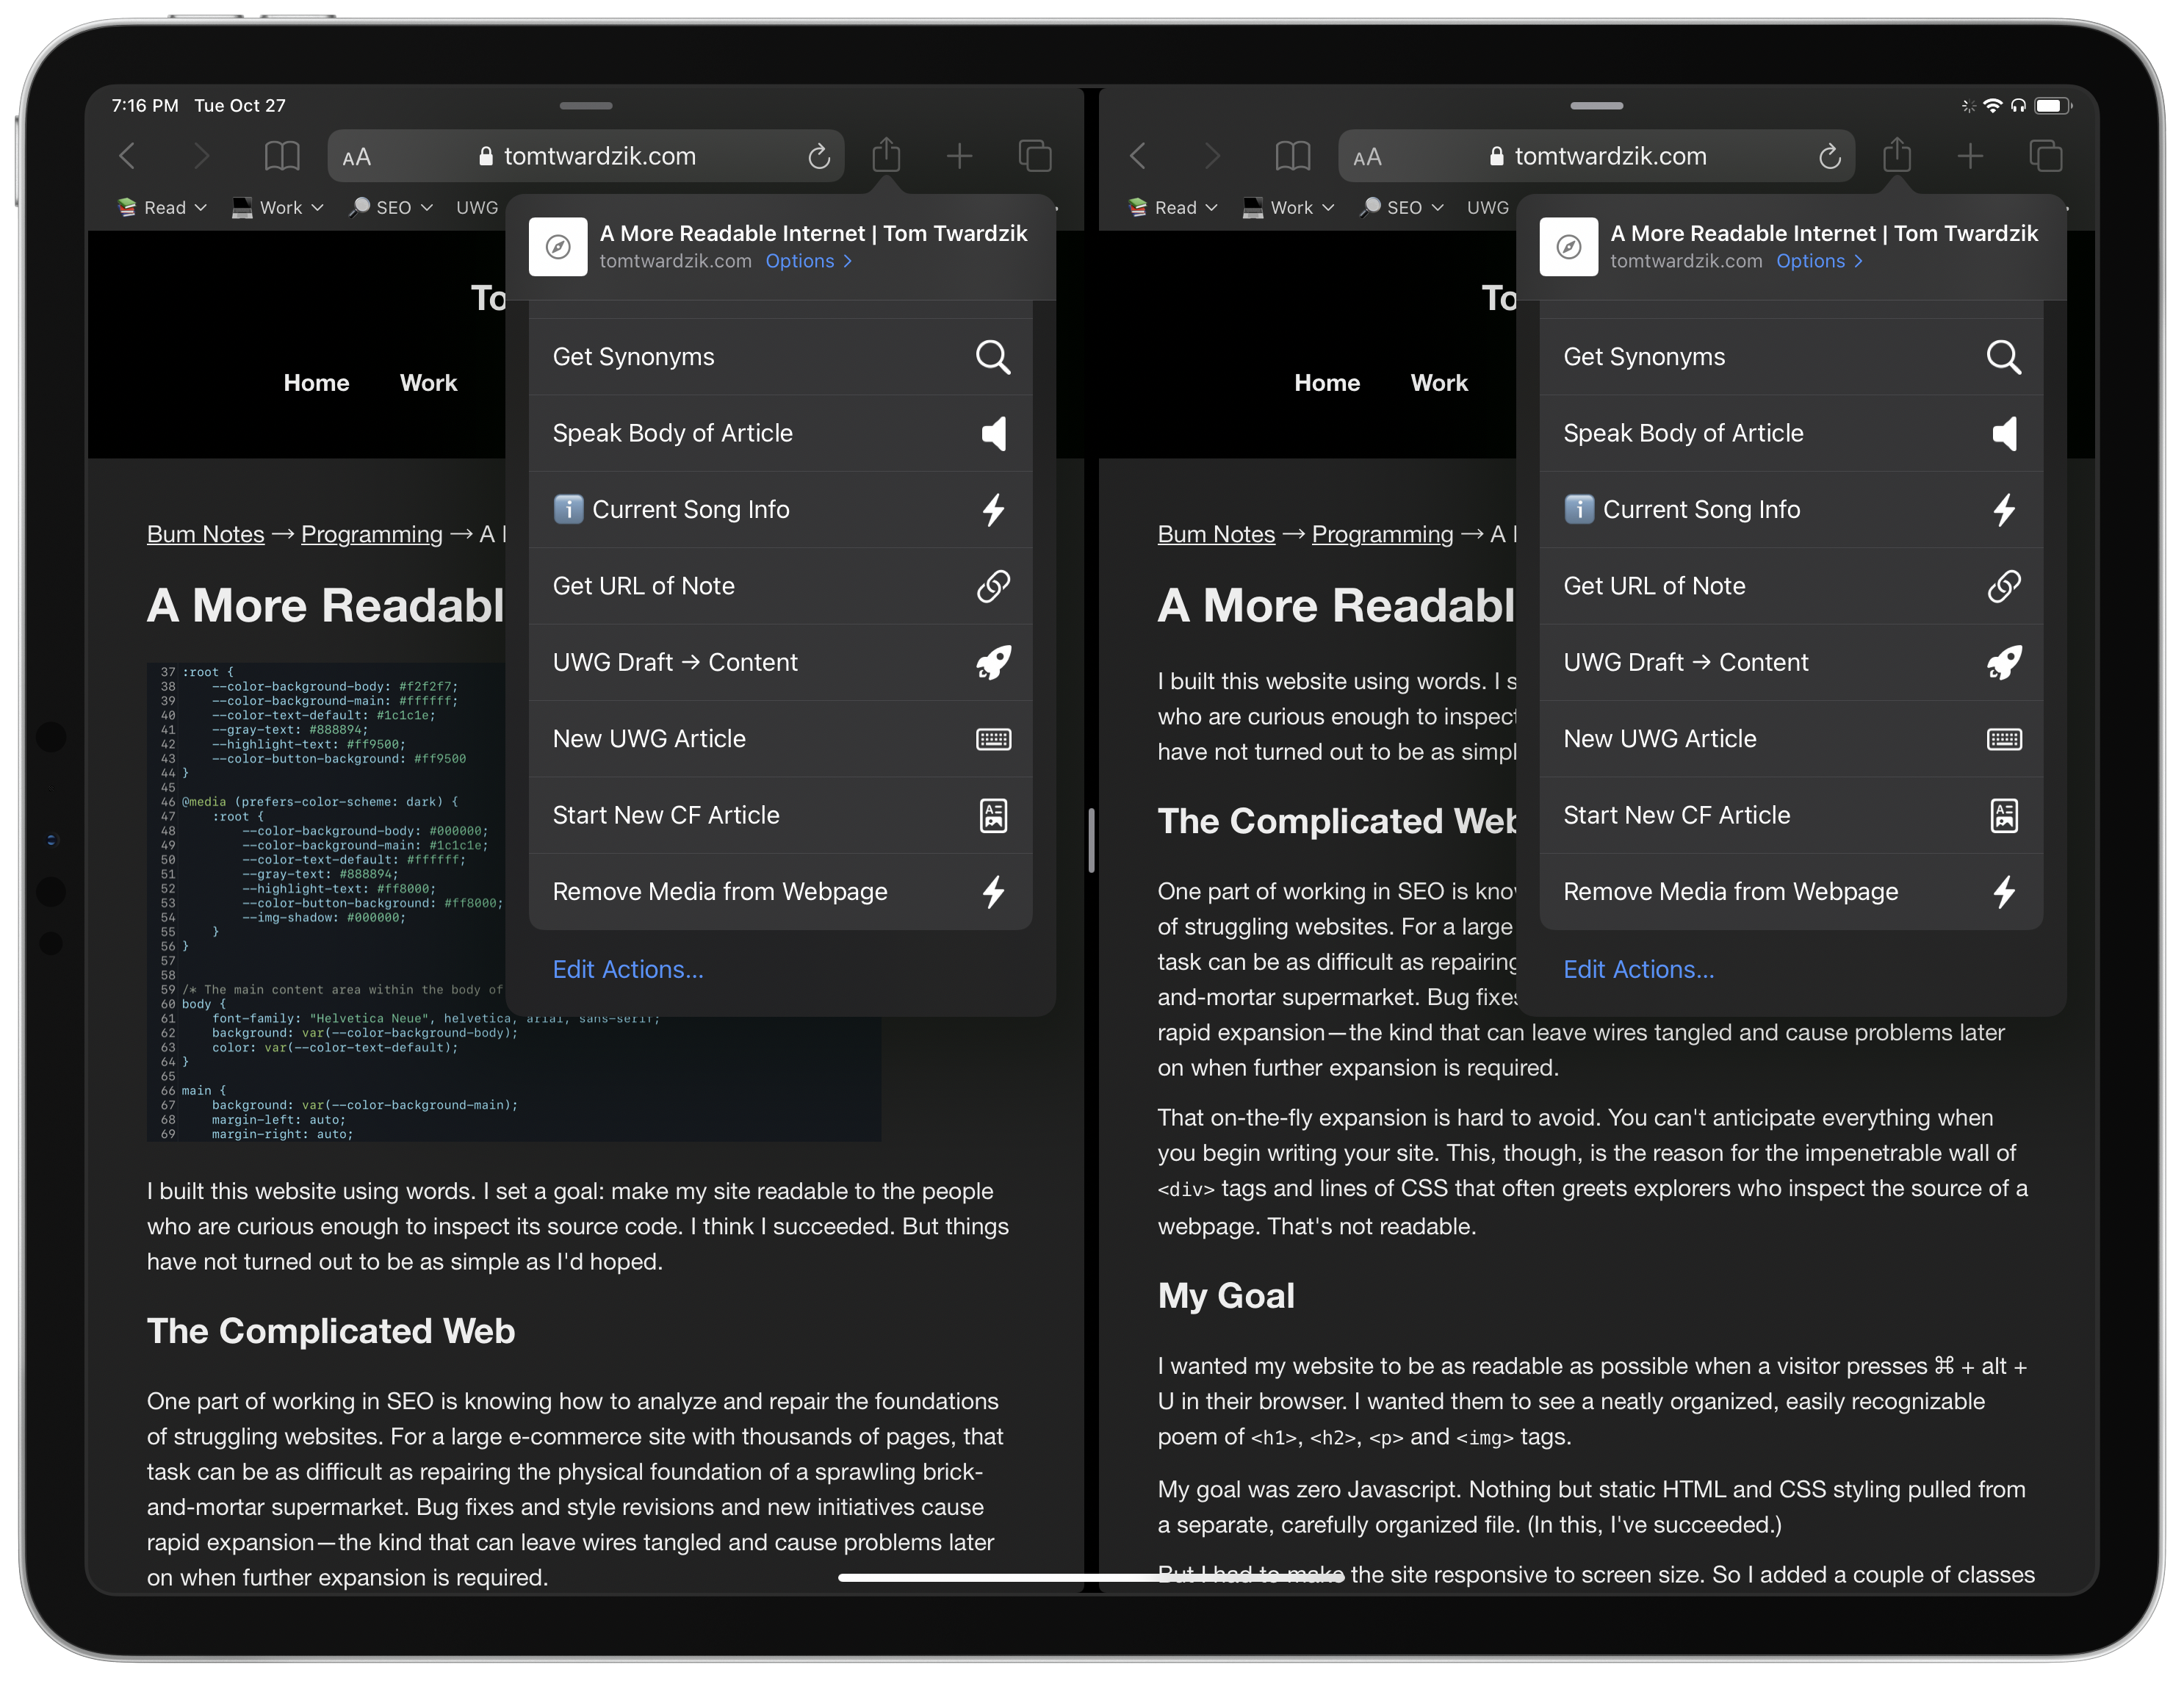
Before (left) and after running the shortcut.
Go to a page in Safari that has an image or video, tap the Share button, scroll down until you see the name of the shortcut you've just created and run it!
You'll have to allow Shortcuts to run JavaScript on the webpage. Once you tap "Allow" the unwanted media will... poof—disappear!
Download the shortcut here!